
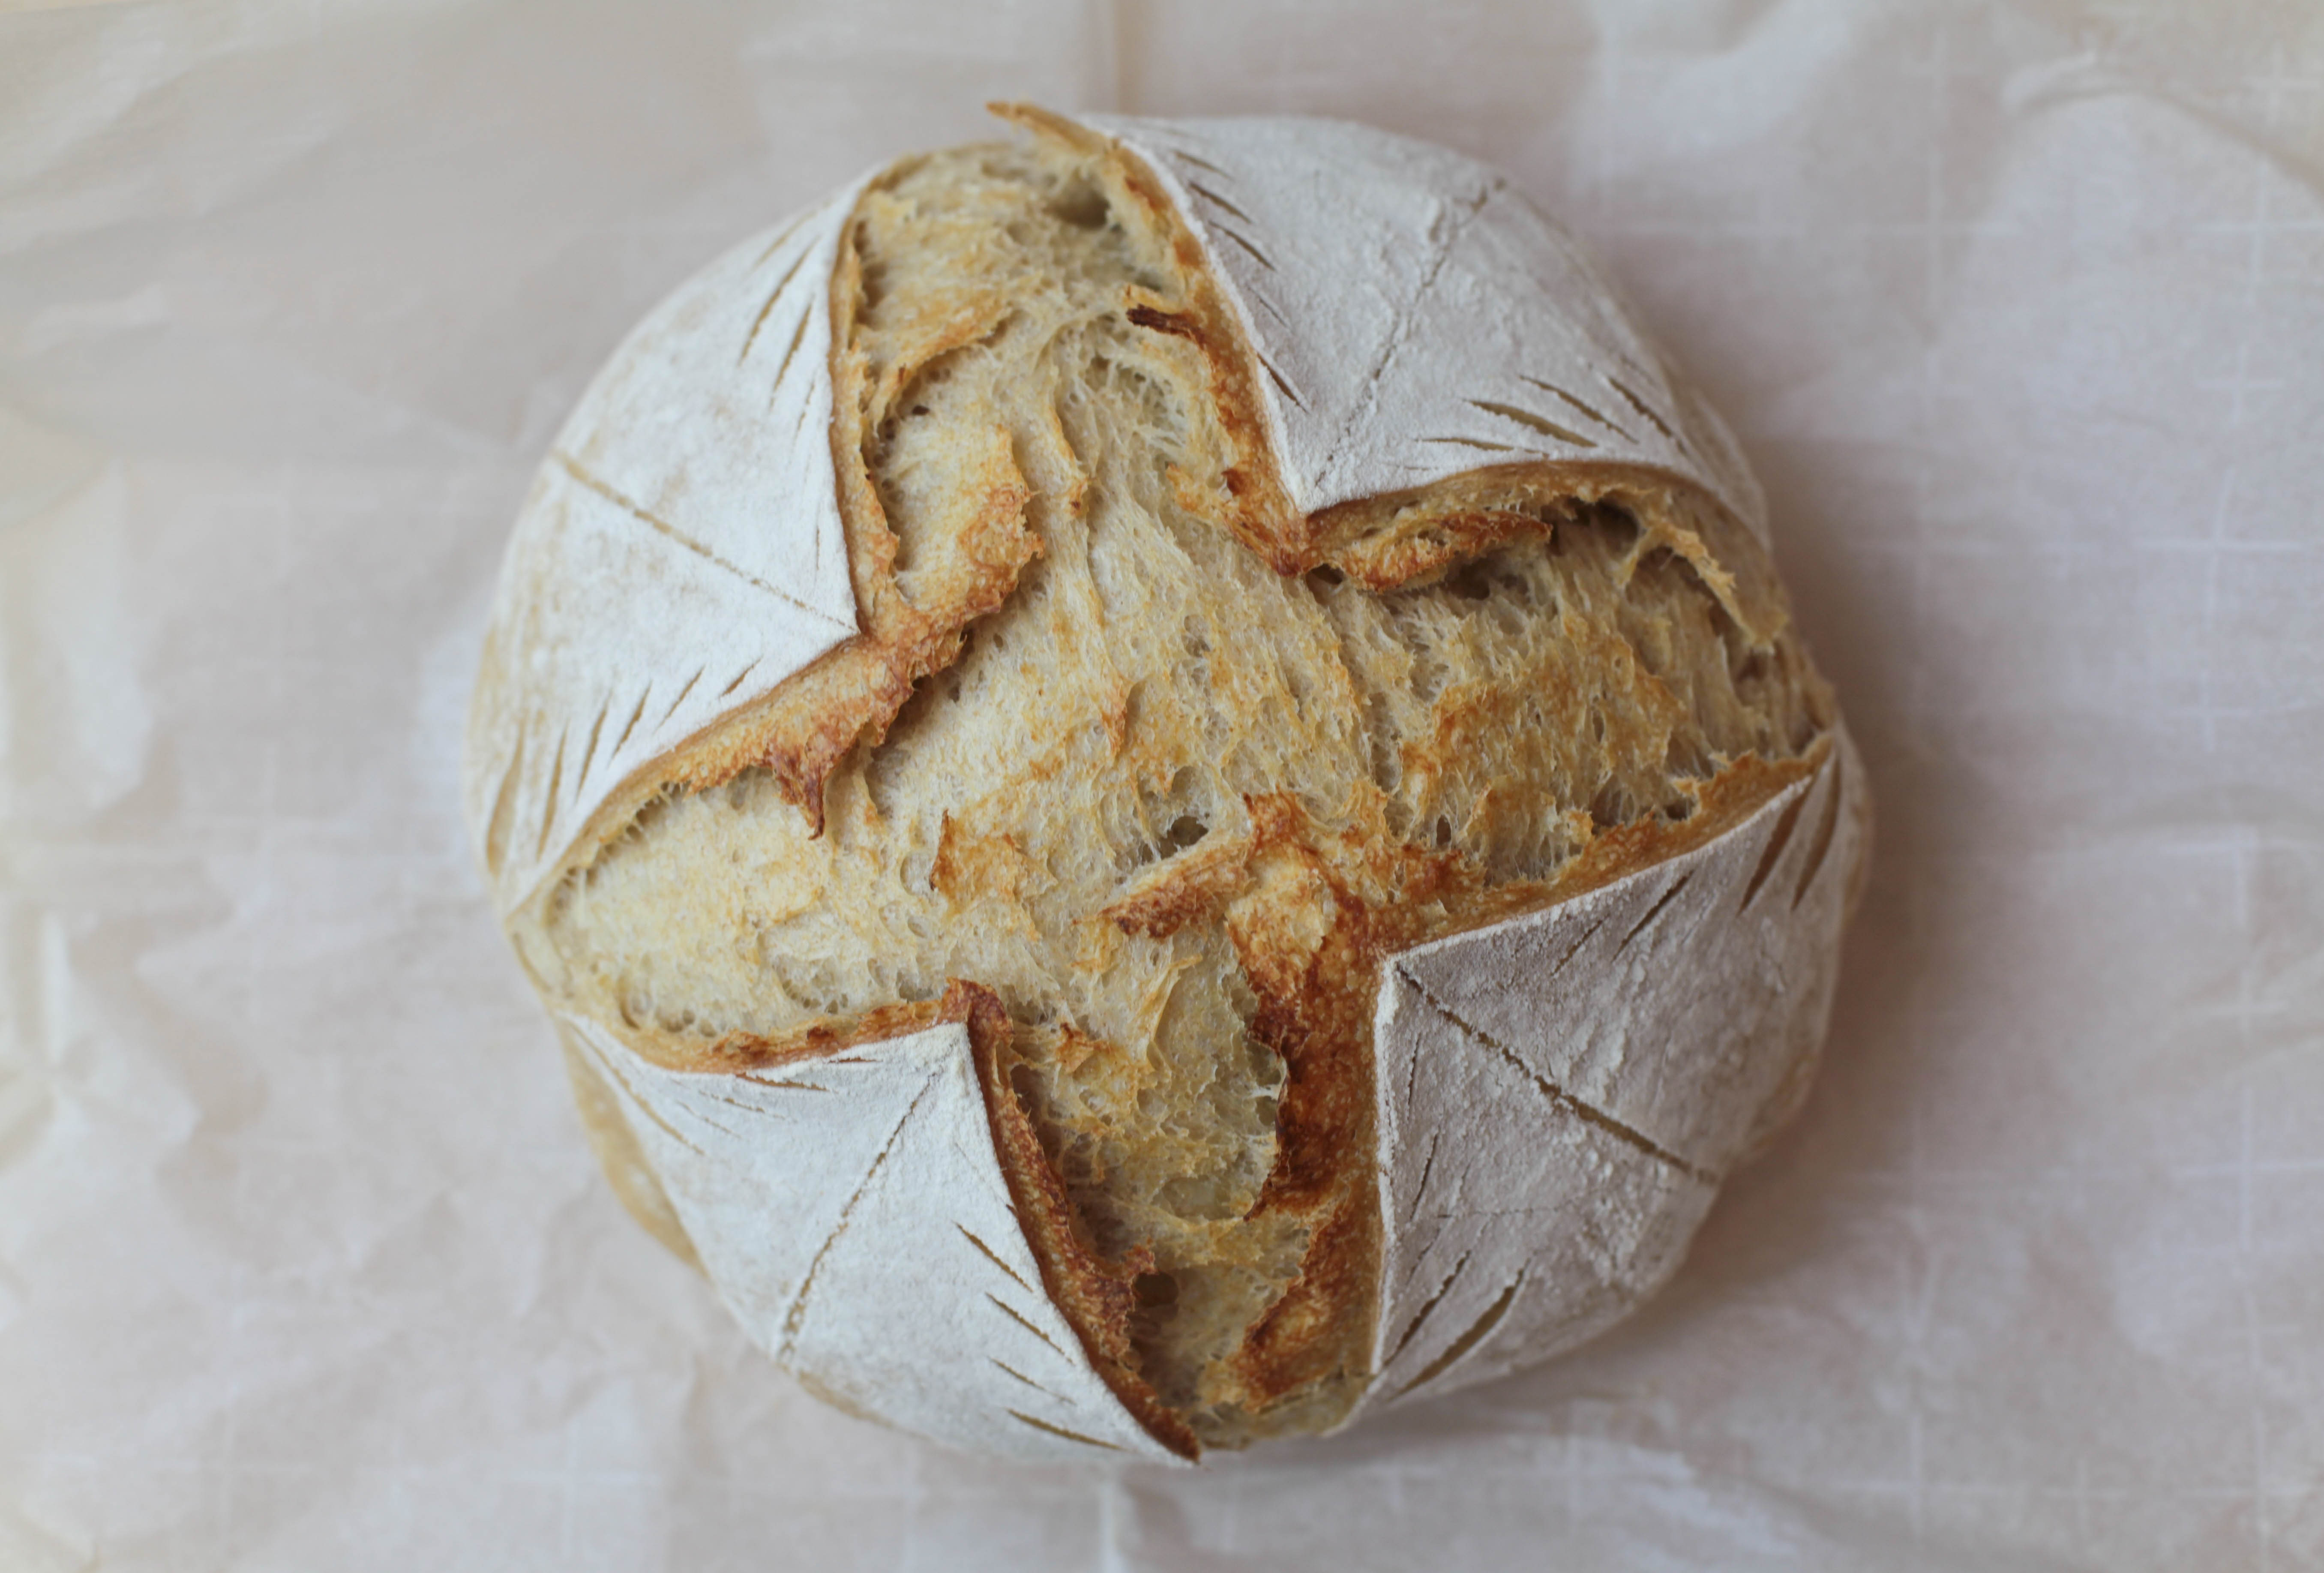
There’s nothing quite like a warm, fresh loaf of sourdough bread right out of the oven. The warmth of the kitchen and the smell of the bread both permeate your senses, revealing a level of comfort and familiarity that only baking can create. There’s something to bread, something that grounds us, allows us appreciate the craft of making food. Perhaps it’s breads ancient roots that somehow help us transcend time and help us reconnect with the very things that make us human. Maybe I’m just rambling, or maybe there really is something special about bread. However you cut it (no pun intended), sourdough bread is delicious, healthy, and fun to make, once you get the hang of it. Here’s how I create wonderful boule’s of sourdough bread.
What is Sourdough Bread?
It’s a valid question. What on Earth is sourdough bread? We’ve all heard the word thrown around, most of us have had it many times, but how is it any different than regular bread. Well, by definition, sourdough is a naturally leavened bread that negates the use of commercial yeast. Instead, it uses something called sourdough starter, which is a fermented mix of flour and water, to make it rise and give it its trademark tangy, sour flavor. Without getting too much into the science weeds – essentially, a simple mixture of flour and water is fermented at room temperature. The natural yeast and (good) bacteria consume natural sugars found in flour, which are then converted to carbon dioxide and lactic acids, which are responsible for the rise and taste of sourdough, respectively.
What do you need?
I try to refrain from the word need, because you could probably get by with no special equipment and still create wonderful bread. But I find there are a couple tools that are going to make this process a lot easier.
- kitchen scale – a scale is a very useful tool when baking. Baking is all about precise measurements, and there is no better way to measure out exact ingredients than a good old-fashioned scale. There are tons of digital scales on the market for pretty cheap. I recommend searching Amazon.
- banneton – a banneton, or proofing basket, is a small basket that will help keep the shape of dough during cold fermentation.
- dough whisk – a dough whisk is just a whisk that contains stiff metal loops that are ideal for mixing hard to handle dough.
- bread lame – a bread lame is a sharp tool used for scoring sourdough bread. I’ll get more into the scoring of sourdough further into this post.
- dutch oven – a good dutch oven with a lid is an invaluable piece of kitchen equipment. I use it for everything.
Ingredients
- 150g active starter
- 400g all purpose flour
- 100g whole wheat flour
- 15g olive oil
- 10g salt
How to Make Sourdough Bread
For starters, once again, no pun intended, there are literally thousands of different ways that one can make sourdough bread. I did not master sourdough bread on my first try. I didn’t even master sourdough bread on my 10th try. It took time and time again to get the hang of making good sourdough bread. It required a lot of experimentation to create the recipe/ratio that finally worked for me. I also am not sitting here claiming to be a total expert on sourdough bread. Like I said, I found a system that works well for me, but it might not work well for you. However, through my trial and errors, I came to realize that there are two, non-negotiable factors that must be met in order to make good sourdough bread. One, is having a strong starter; and two, is creating right environment. I’ll further elaborate on this as we go.
To begin, we must have a strong sourdough starter. I created my own starter, which I won’t go into too much detail about here, but I do plan on writing another post which explains my process with that. In the meantime, if you don’t want to wait a week to create your own starter, you can go to just about any bakery that sells sourdough and more than likely they will sell you a small amount, or probably just give it to you.

Assuming you already have the starter, begin by pouring 150g of sourdough starter into a large bowl. Then follow that up with 300g of warm water. We don’t want the water hot, but warm is nice. The warmth will give the mixture a comfortable environment in which to work. It’s best to aim for somewhere between 90°F-100°F. Mix the starter and water until it’s combined and cloudy.
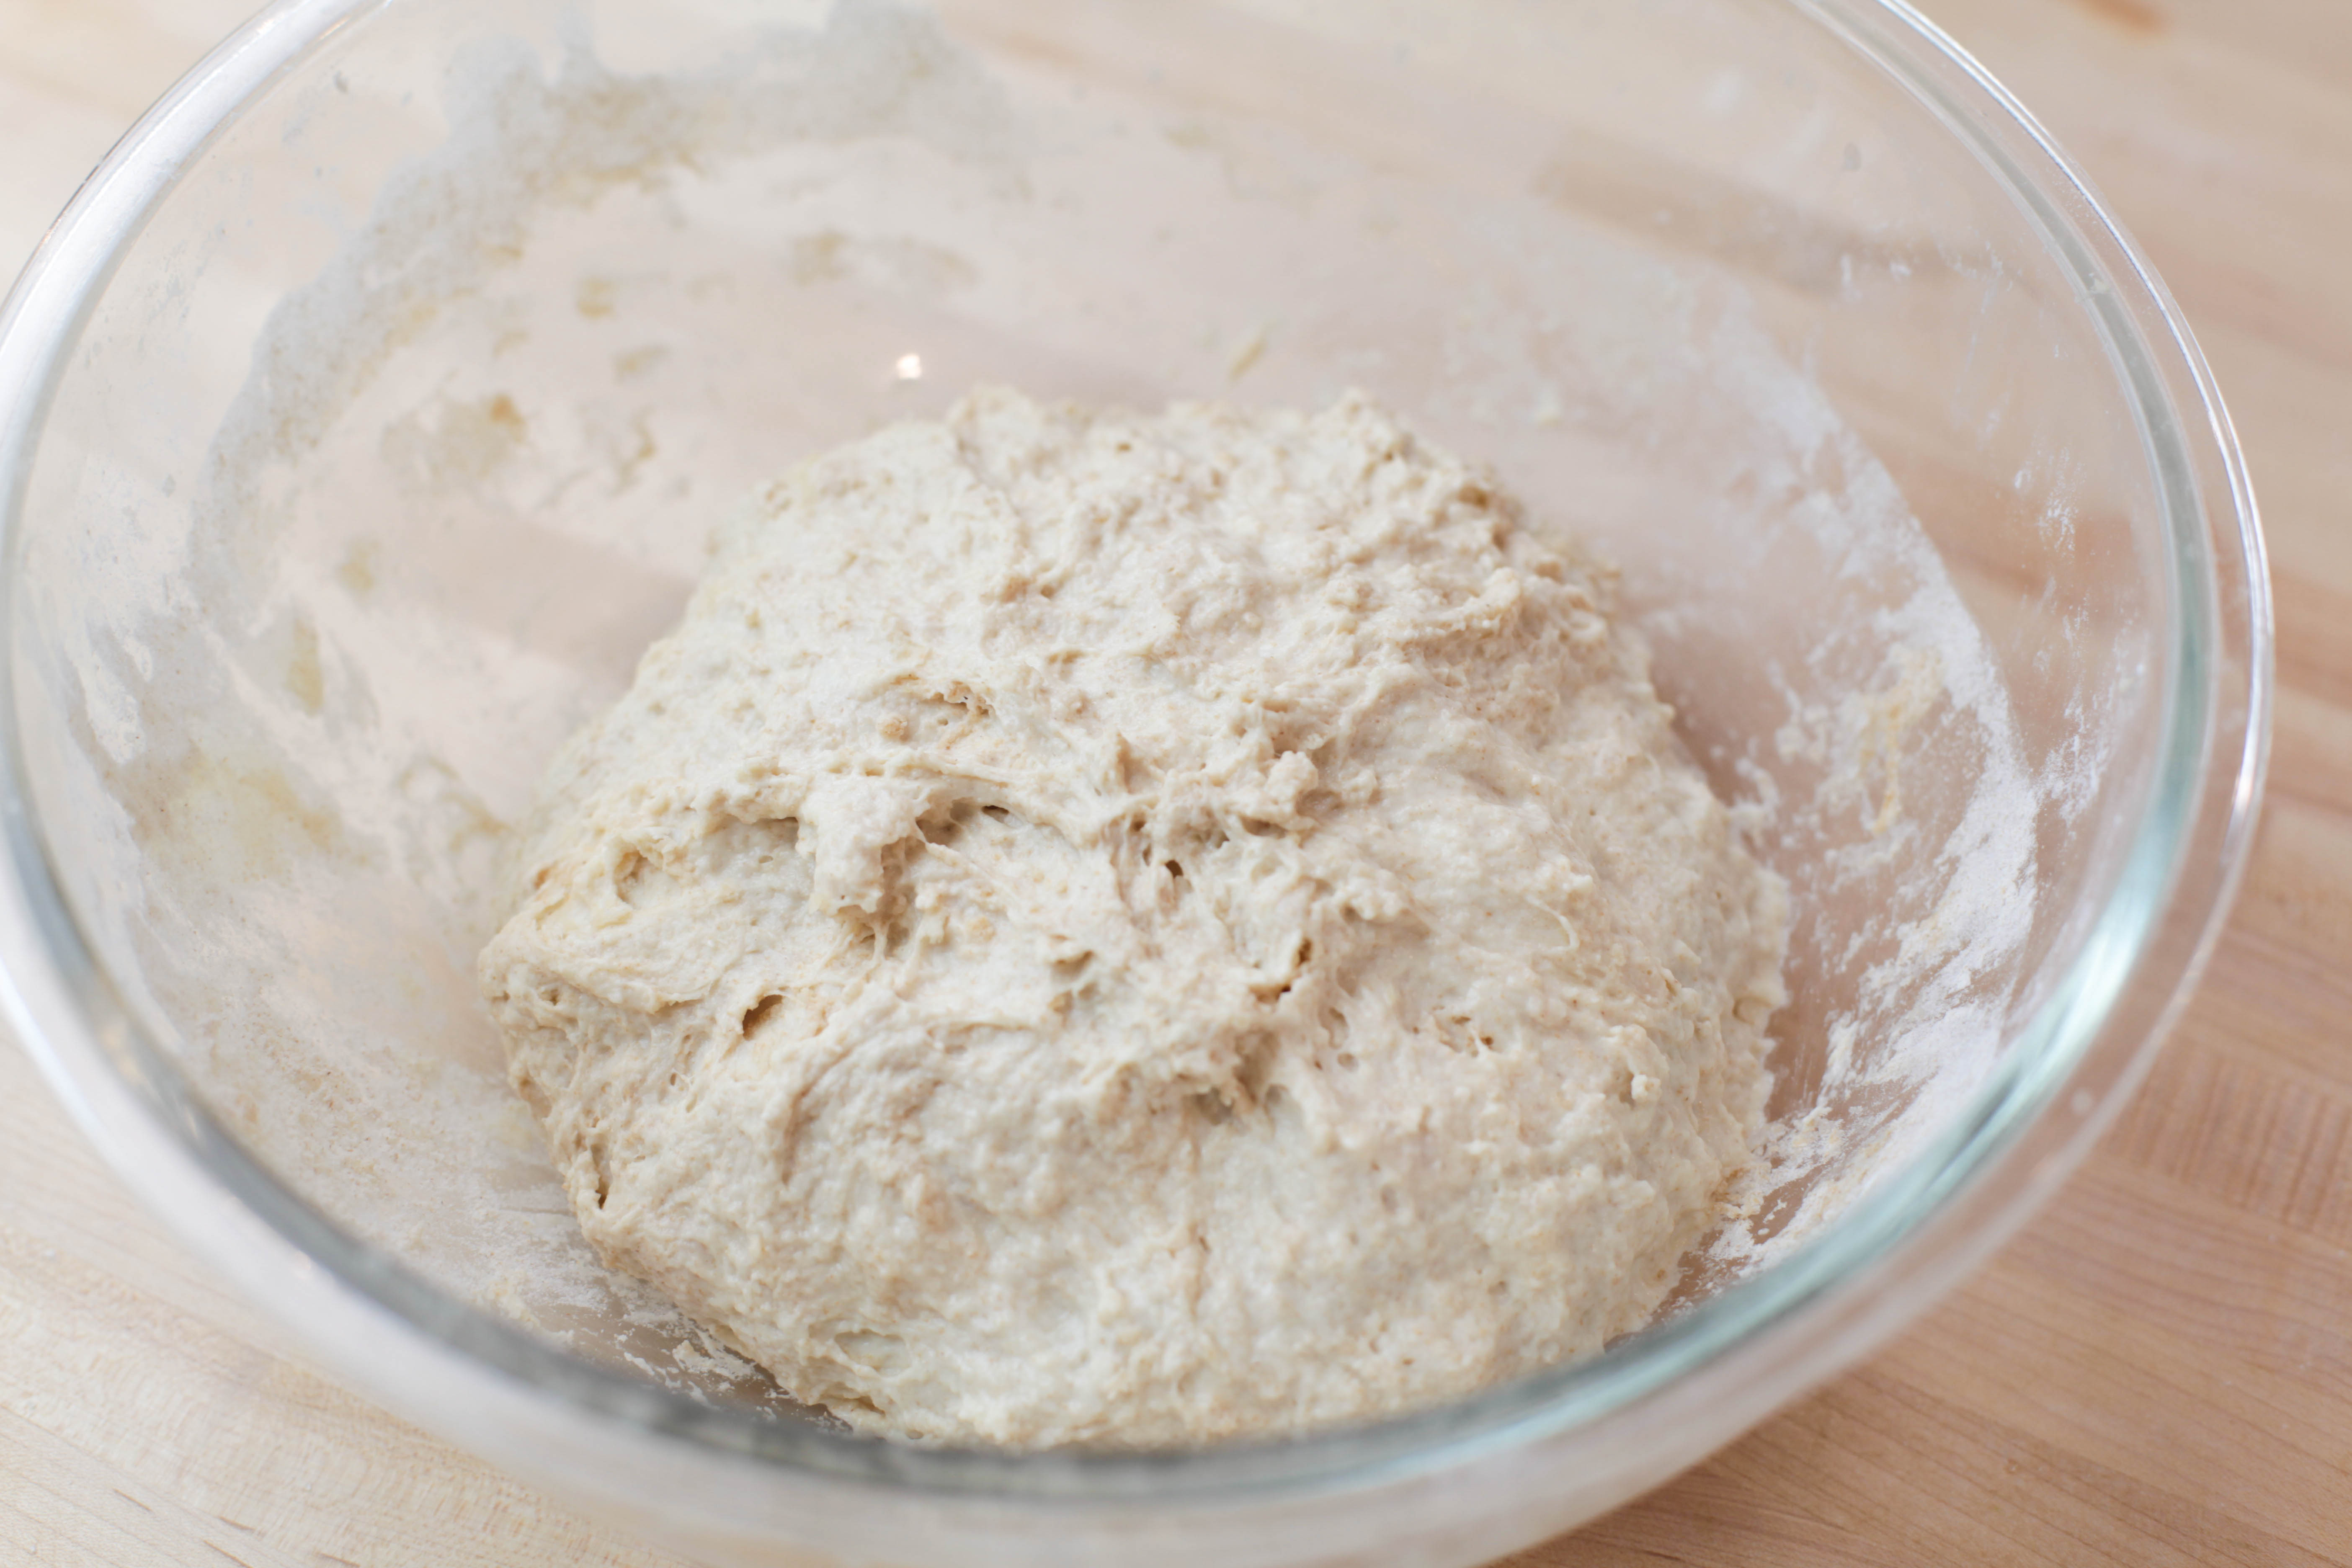
Next, add 15g of olive oil to the mixture and give it a light stir. Then add 400g of all purpose flour, followed by 100g of whole wheat flour. Lastly, add 10g of granulated salt. Using a dough whisk, mix until the dough is completely saturated and you no longer see flour. It will start out as a shaggy mess but continue to work it until it becomes more cohesive. I like to start out with the dough whisk, then move on to using my hands to really press the dough together. It should look something like the photo below.
Stretch and Fold
Place a wet cloth over the dough and let it rest for 1 hr at room temperature. Over the next 3 hours we will do what’s called” stretch and folds”, which is exactly what it sounds like. After 1 hour, remove the cloth, and pinch one side of the dough and stretch it over as far as it will go without tearing. Repeat the process, turning the bowl as you go, for about 8-12 pinch and folds total. Repeat the process over a 2-3 hour period, stretching and folding the dough roughly every 30-45 minutes. You will notice the dough become stronger and smoother each time you uncover it. This step is imperative to building a strong gluten network, which is what holds the dough together, allowing it to beautifully expand without tearing.
Bulk Fermentation
After a few hours, the dough should be ready for its first rise. Remove the dough and apply a light layer of olive oil to bottom and sides of the bowl. This is going to help when it comes time to remove the dough, after it’s risen, from sticking to the bowl. Place the dough back in and cover with the wet cloth. Going back to the second of the “non-negotiable factors” I mentioned in the beginning of this article, is the environment. Placing the dough in a warm spot that maintains a temperature of 74°-79° is ideal. I have a cabinet right above my refrigerator that works well for me, but you will have to find a spot in your home that works for you. I tried closets, the oven with a light on, the counter, and ultimately I had the best results with this cabinet.
The amount of time it’s going to take your dough to rise is going to be based on, once again, those two factors – the strength of your starter and the environment it’s in. We want the dough to about double in size and this can take anywhere from 4 hours (if your kitchen is warm) or 12 hours. Don’t judge this step by time, judge it by the dough. Read the dough and adjust as needed. If your dough is just not rising and you are definitely using a strong, active starter, then more than likely the environment is not right. Feel free to leave the dough out on the counter overnight until it’s risen by about 100%. The two photos below show my dough before and after its first rise.


You can clearly see the increase in size and the change in texture. You can even see little bubbles in the dough on the right, which tells me that natural yeast is doing its job by producing carbon dioxide, creating gas bubbles.
Pre-shaping the dough
Once the dough has doubled in size, it’s time to pre-shape and place it in the banneton. Since we oiled the bowl, the dough should come out pretty easily. Do not worry if a little bit of it sticks to the bowl. Lightly flour your work surface and gently dump out the dough. We don’t want to release any of the gas that has been building in the dough – that’s what’s going to make it rise and look like bread!
Stretch the dough out into a rough square or rectangle and proceed to fold the sides inward in thirds. Then turn the dough so it’s positioned vertically towards you and roll the dough upwards. Tuck in the sides to create some tension being careful not to tear the dough. Carefully flip the dough upside down, so the smooth, tension held part is on your work surface, and pinch the sides, lightly pulling inwards.
Cold Fermentation (Proof)
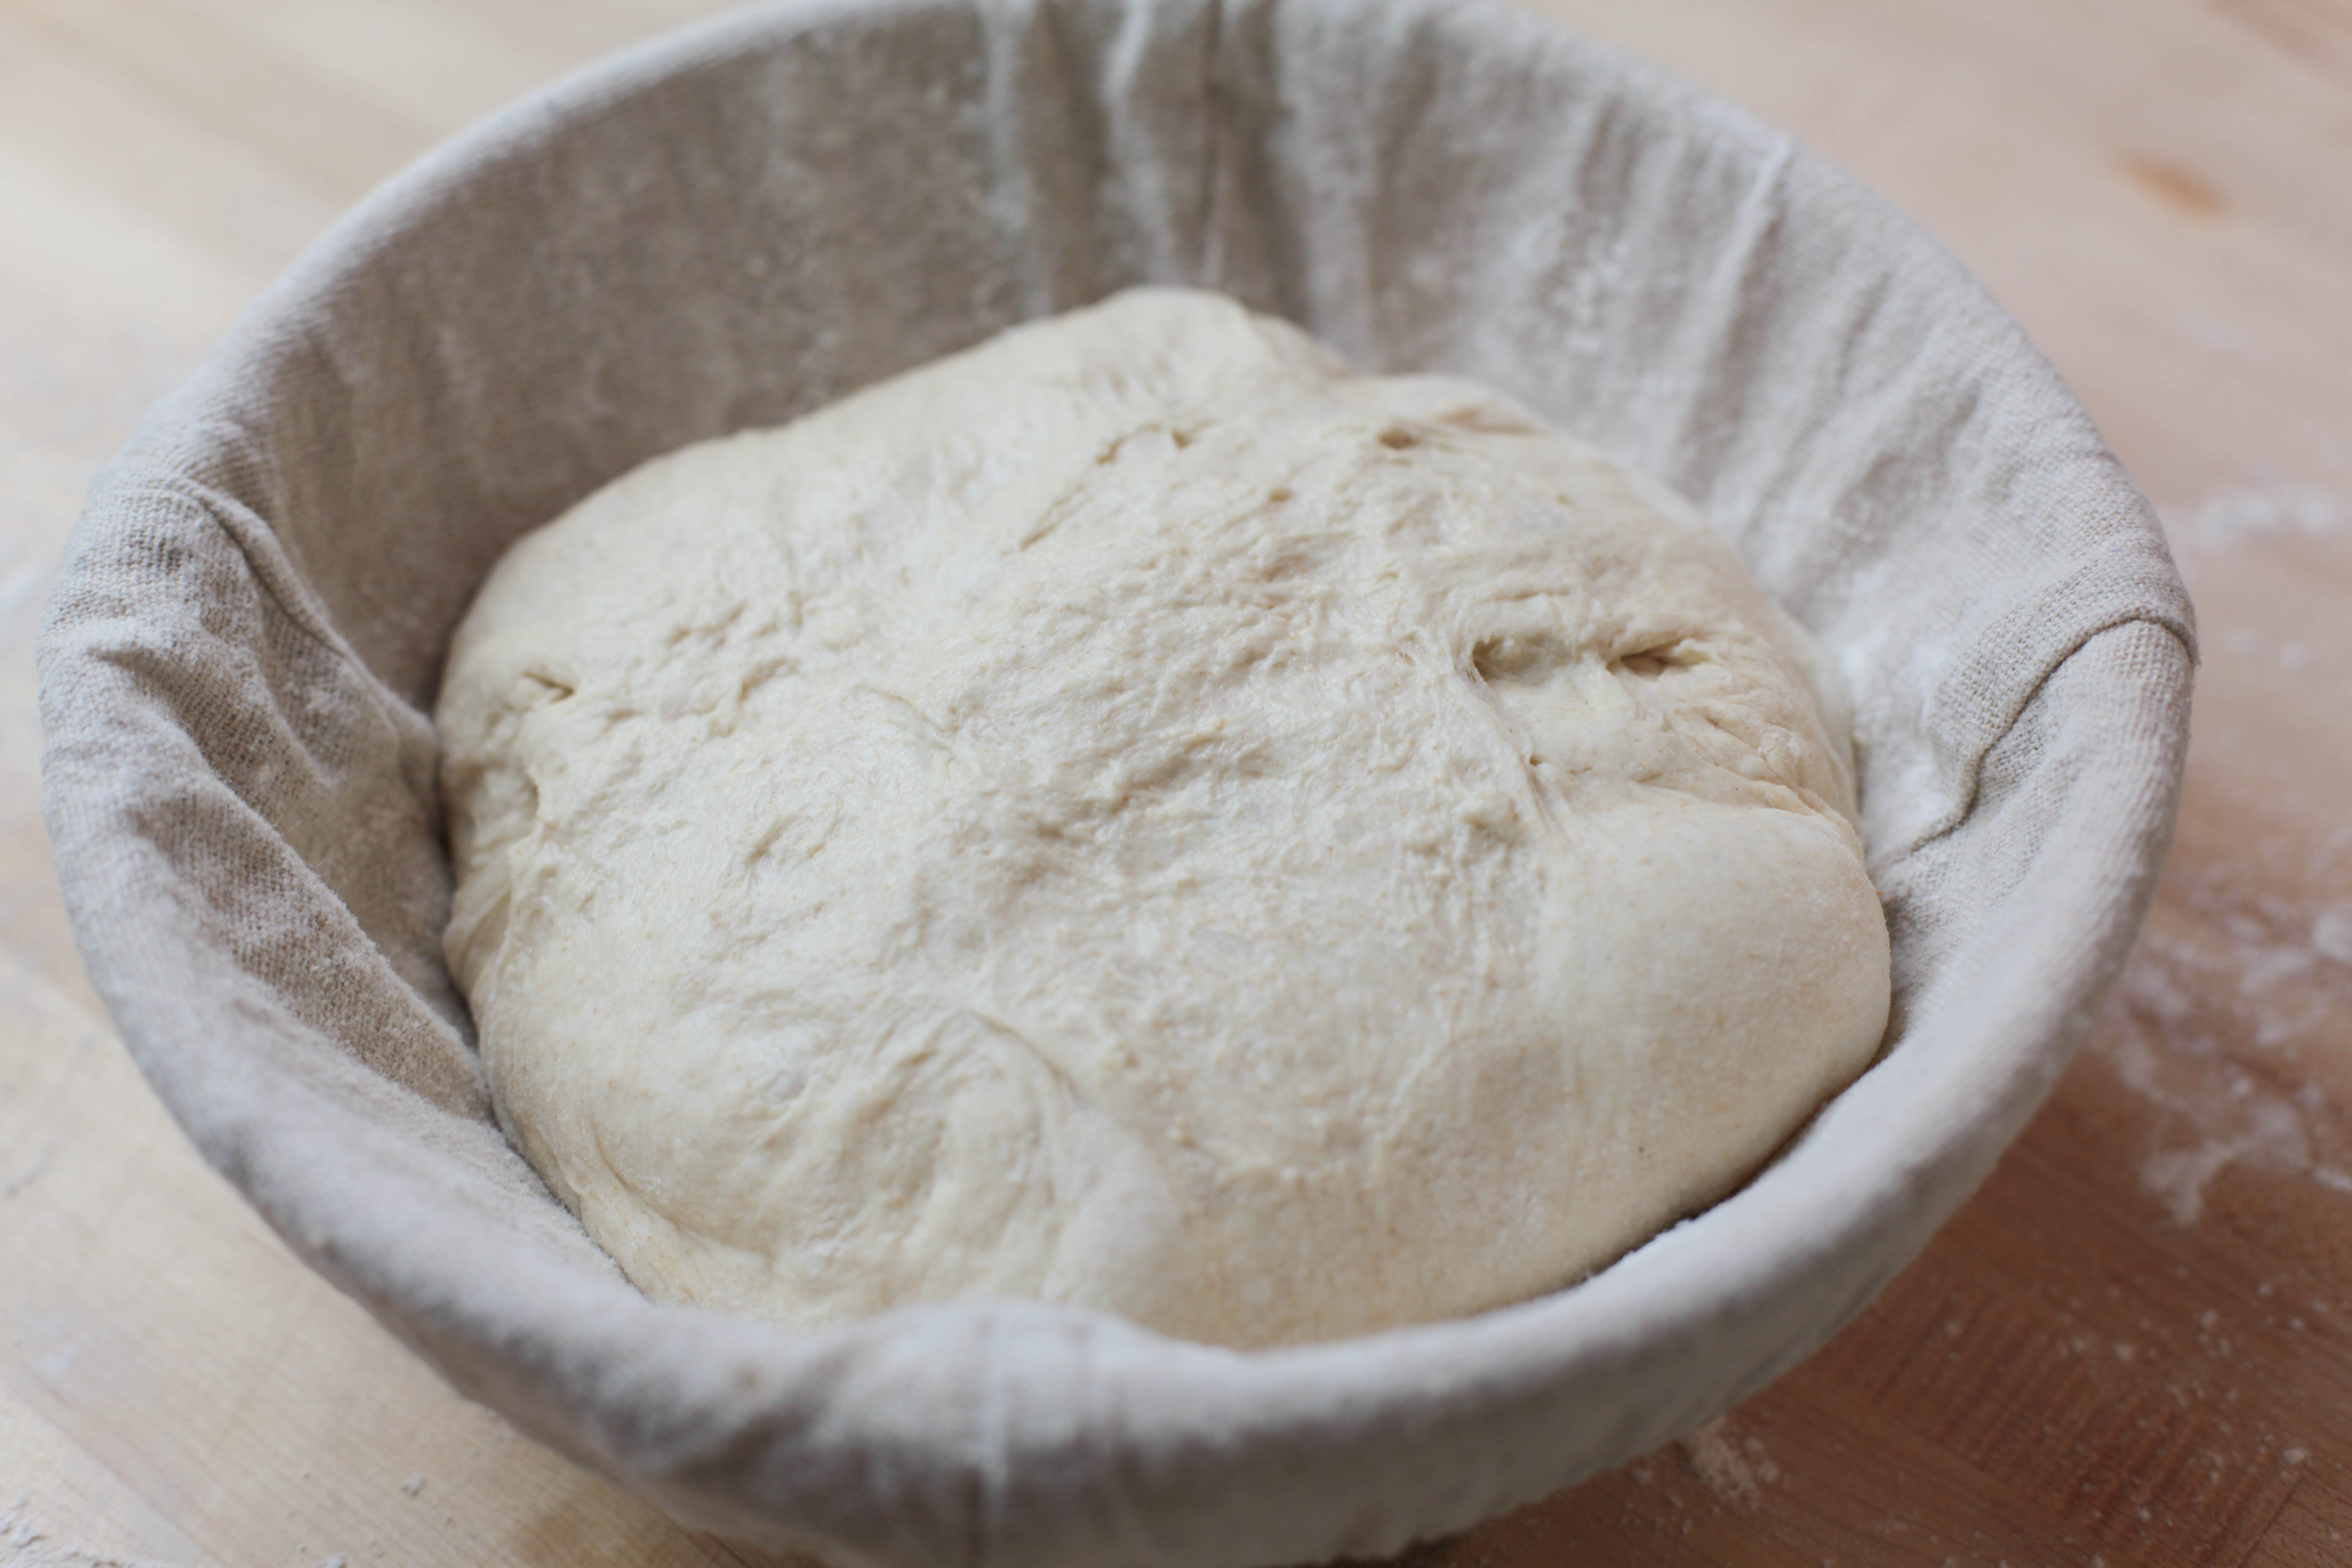
Lightly flour your banneton and place the dough, smooth, tension held side down. I like to once again, pinch the sides and pull them inwards, creating as much tension as possible. Cover the banneton with plastic wrap then place in it the refrigerator overnight for about 8-12 hours. There are a few benefits to cold fermentation. It essentially slows the down the fermentation process to a more controlled state. It allows for stronger gluten development, and will often result in a softer crumb.
The Morning After
The time has finally come to bake this bread you have been working on over the last 24 hours. Yes, it takes about 24 hours to prepare this bread, but for the most part, it’s pretty hands off. It may seem like a lot, and it kind of is at first, but I promise once you get the hang of it, it becomes like second nature.
Preheat your oven to 450°F and place your dutch oven with the lid on, inside the oven. Place a piece of parchment paper on your work surface. Carefully, without squeezing the dough, place the dough on the piece of parchment. Now it’s time to score.
Scoring the dough
This is the fun part. This is where you get to really make the bread your own and create cool designs, if you so choose.. Of course, you don’t need to make complex designs, but it is something I find quite enjoyable.
Score the dough is using a sharp blade or razor to create a 1/4” thick slice. The idea of scoring sourdough bread is simple. We are essentially telling the bread where to split and rise. If we did not score the dough, it would pretty much rise wherever its weakest point is. Lightly flour the surface of the dough. Using a razor or bread lame, make a 1/4” deep slice in the center of dough – this is going to be our expansion slice.
Just a couple tips when it comes to scoring your dough. It’s always easier to score cold dough. I like to wait until the oven is preheated until I remove the dough from the refrigerator. It can also sometimes help to dip your bread lame in water before slicing. The blade can sometimes stick, resulting in jagged lines.
Once the dough has been scored, remove the dutch oven from the oven. I love Le Creuset’s 3 1/2 qt. dutch oven. I use this thing for everything.
Place the parchment with the dough inside the dutch oven and cover it with the lid. Place the dutch oven in the oven and bake for 30 minutes. After 30 minutes, remove the lid, lower the oven temperature to 400°F, and allow the bread to continue baking for 15 minutes. Leaving the lid on during the first half hour will allow the dutch oven to hold in the heat which will help the bread rapidly rise. Removing the lid will allow the bread to develop a nice, golden brown crust. Let the bread cool for at least 45 minutes prior to slicing. Hope you enjoy!
Sourdough Bread

This recipe for sourdough was developed through a lot of trial and error. It uses a dough that is 60% hydration and consists of 400g of all purpose flour and 100g of whole wheat flour.
- 150 grams active sourdough starter
- 400 grams all purpose flour
- 100 grams whole wheat flour
- 300 grams water (warm)
- 15 grams olive oil
- 10 grams salt
Mix 150g of active starter and 300g of warm water in a large bowl. Mix until the starter is dissolved. Add in 15g of olive oil, 400g all purpose flour, 100g of whole wheat flour, and 10g of salt. Mix until combined and cover with a wet cloth. Let rest for 1 hour.
Remove the cloth. Pinch and stretch the sides of the dough, pulling them inwards towards the center. Stretch all sides of the dough around 8-12 times. Repeat this step over the next 3 hours with 30-45 minute intervals.
Remove the dough from the bowl. Coat the bottom and sides of the bowl with a light layer of olive oil to keep the dough from sticking. Place the dough back in and cover with a wet cloth. Allow dough to rise until it about doubles in volume.
Dust surface with flour, dump out dough, and shape into a tight round circle (boule). Place top down inside banneton. Pinch the sides and pull them inward to create as much tension in the dough as possible without tearing it. Wrap in plastic and place in refrigerator overnight (9-12 hours).
Preheat oven to 450°F and place dutch oven inside. Once the oven is preheated, remove the dough from the refrigerator. Place the dough, top side up on a piece of parchment paper. Score the dough using a bread lame, razor, of sharp knife.
Bake at 450°F with the lid on for 30 minutes. Remove the lid for the final 15 minutes allowing the crust to develop some color. Let cool for 45 minutes before slicing.
Leave a Reply